Setting Up a G Router for Bandwidth Monitoring: A Comprehensive Guide
Bandwidth monitoring is a crucial aspect of network administration, especially in today's fast-paced digital landscape. With the increasing number of devices and internet-connected devices, it's essential to ensure that your network is running smoothly and efficiently. In this article, we'll explore how to set up a G router for bandwidth monitoring, providing you with a clear and step-by-step guide to help you achieve optimal network performance.
Why Bandwidth Monitoring is Essential
Effective bandwidth monitoring is vital for maintaining network reliability and performance. By monitoring bandwidth usage, you can identify potential issues, detect network bottlenecks, and take proactive measures to optimize network resources. Without proper bandwidth management, a single user or application can consume excessive bandwidth, leading to poor performance for others.
Prerequisites for Bandwidth Monitoring
Before setting up a G router for bandwidth monitoring, you'll need to ensure that your network meets certain prerequisites. These include:
- A G router capable of supporting bandwidth monitoring
- A stable internet connection
- A compatible device for monitoring, such as a PC or mobile device
- A bandwidth monitoring tool or software
Step 1: Choose the Right Bandwidth Monitoring Tool
There are various bandwidth monitoring tools available, including PRTG Network Monitor, vnStat, and nlbwmon. Each tool has its set of features and functionalities, so it's essential to choose the one that suits your needs. Some popular options include:
- PRTG Network Monitor: A comprehensive network monitoring tool that offers real-time bandwidth monitoring, alerting, and reporting.
- vnStat: A lightweight, open-source bandwidth monitoring tool that provides detailed statistics and graphs.
- nlbwmon: A command-line tool for monitoring network bandwidth, ideal for Linux systems.
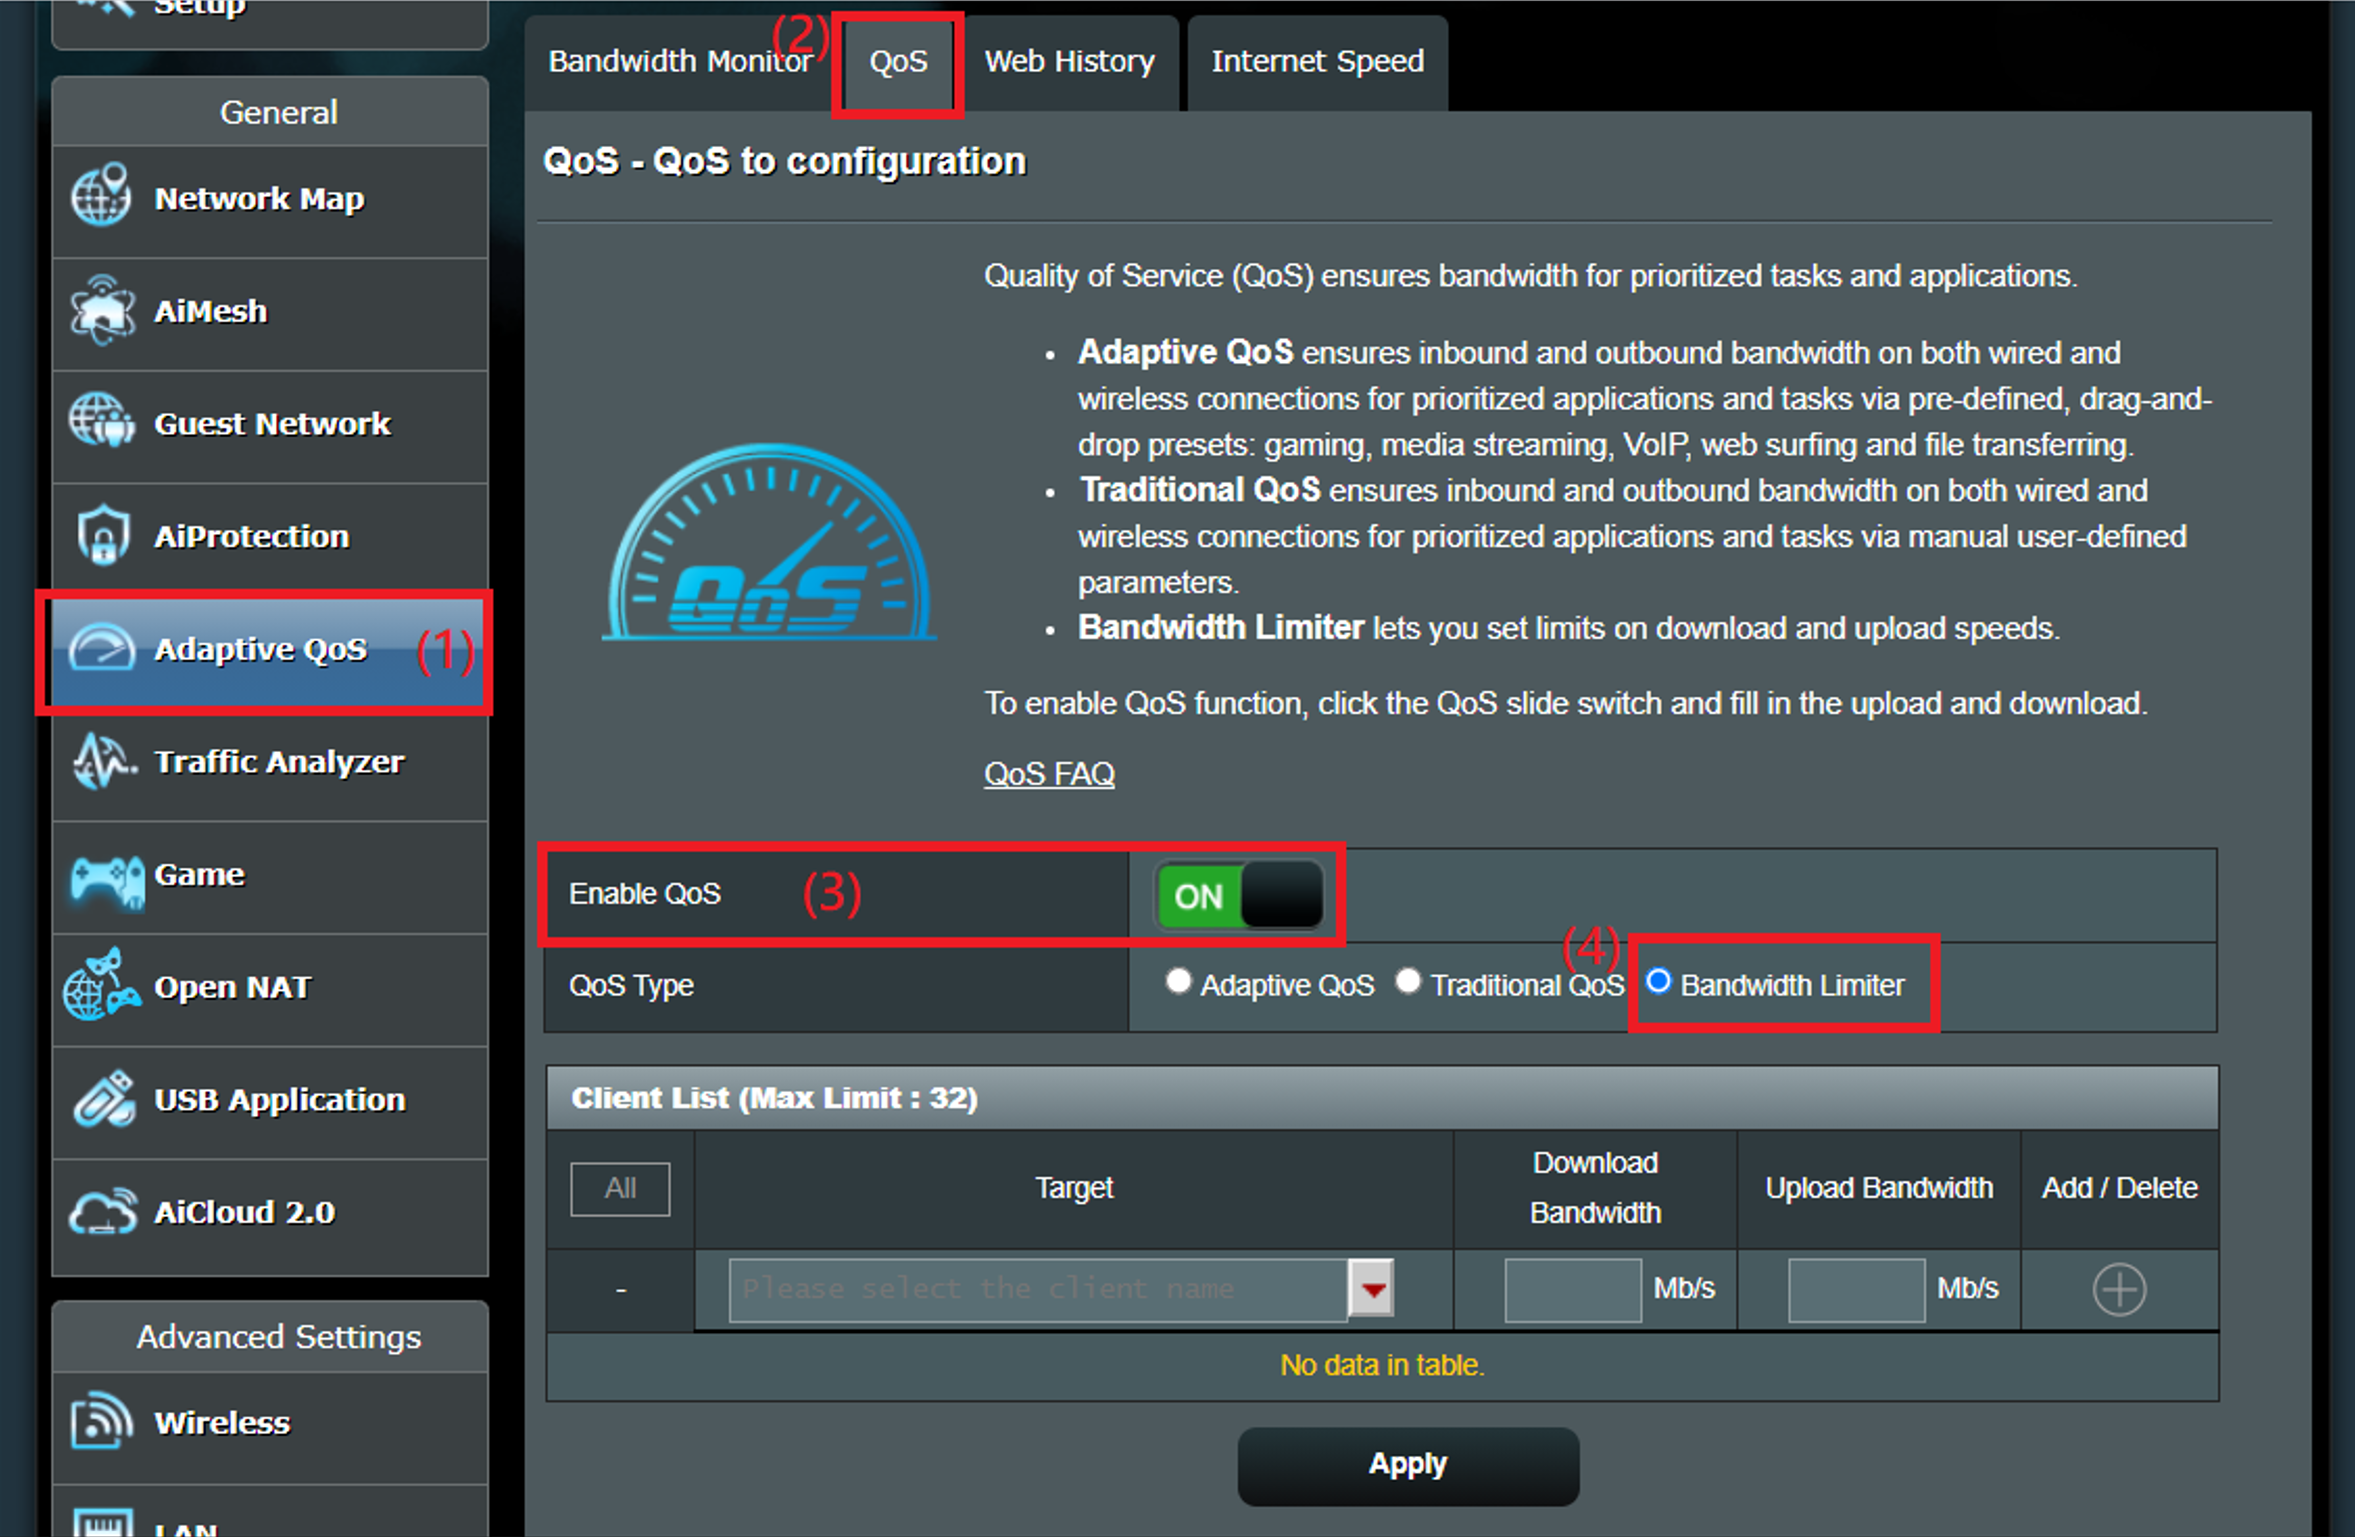
Step 2: Configure the G Router for Bandwidth Monitoring
Once you've chosen your bandwidth monitoring tool, it's time to configure your G router for bandwidth monitoring. The specific steps may vary depending on your router's model and firmware. Typically, you'll need to:
- Access the router's web-based interface
- Navigate to the bandwidth monitoring settings
- Enable bandwidth monitoring
- Configure the monitoring settings, such as polling intervals and threshold values
Step 3: Set Up the Monitoring Tool
With your G router configured for bandwidth monitoring, it's time to set up the monitoring tool. This may involve:
- Installing the monitoring software
- Configuring the monitoring software to communicate with the G router
- Setting up data collection and analysis
Step 4: Visualize and Analyze Bandwidth Data
Once you've set up the monitoring tool, it's essential to visualize and analyze the bandwidth data. This can be achieved by:
- Creating graphs and charts to display bandwidth usage
- Setting up alerts and notifications for bandwidth thresholds
- Analyzing bandwidth data to identify trends and potential issues
Conclusion
In conclusion, setting up a G router for bandwidth monitoring is a straightforward process that requires the right tools and configuration. By following these steps, you'll be able to monitor and manage your network bandwidth, ensuring optimal performance and efficiency. Remember to choose the right bandwidth monitoring tool, configure the G router, set up the monitoring tool, and visualize and analyze bandwidth data to unlock the full potential of your network.
Need More Resources?
For further assistance and resources, we recommend:
- Referencing the documentation for your G router and bandwidth monitoring tool
- Consulting online forums and communities for technical support
- Joining online webinars and workshops for network administration training

![[OpenWrt Wiki] Bandwidth Monitoring Guide](https://manuals.plus/wp-content/uploads/2023/05/peplink-MAX-BR1-Pro-5G-Pepwave-Router-Bandwidth-control.jpg "[OpenWrt Wiki] Bandwidth Monitoring Guide")

![[Adaptive QoS]Bandwidth Monitor Introduction and Setup guide](https://i.ytimg.com/vi/VUGtb8Crokw/maxresdefault.jpg "[Adaptive QoS]Bandwidth Monitor Introduction and Setup guide")


.png "How to Set Up Flow-Based Monitoring on a MikroTik Router")


 | T-Mobile 5G Home Internet")