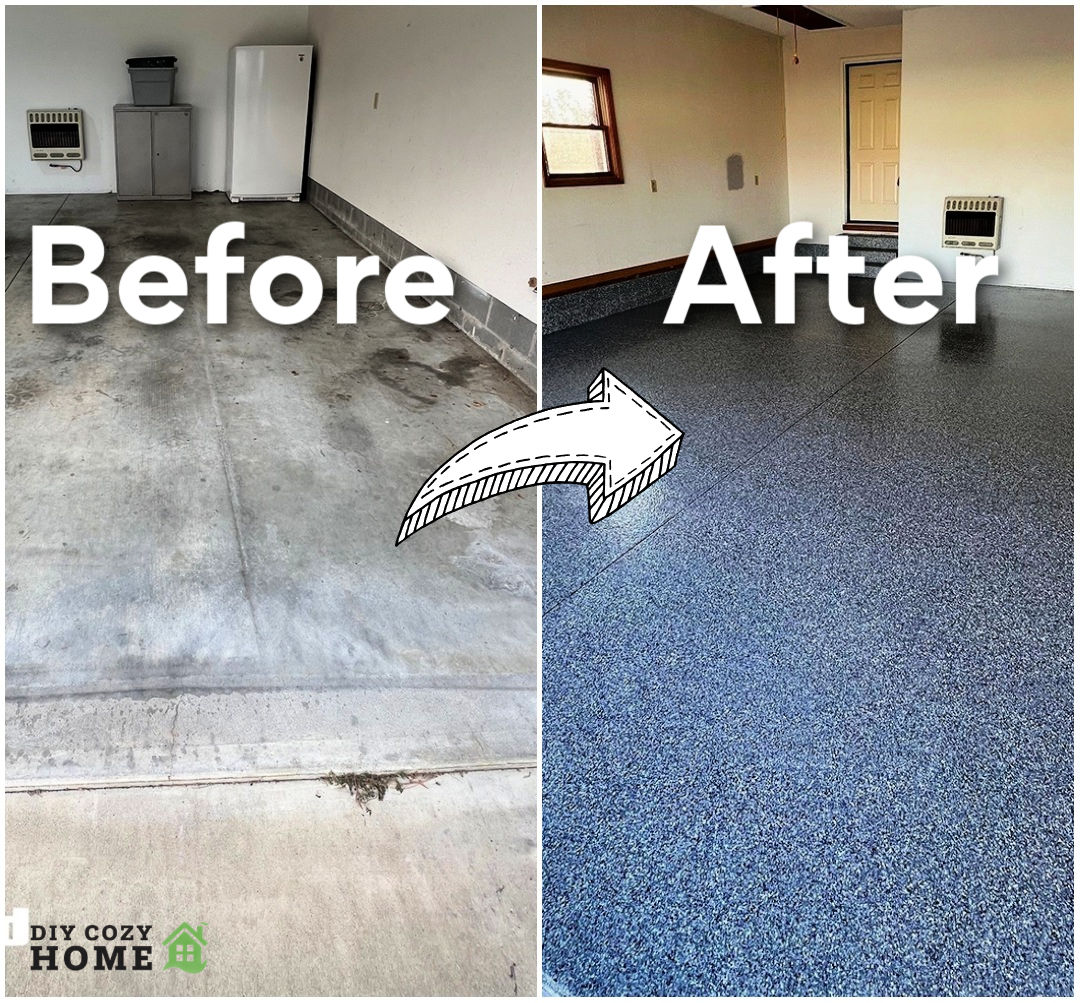
Ultimate Guide to Garage Floor Epoxy Installation Process
Are you considering a garage floor epoxy installation process for your home or business? Epoxy flooring is a popular choice due to its durability, stain-resistance, and sleek appearance. However, understanding the process can be overwhelming, especially for first-time homeowners. In this article, we will walk you through the garage floor epoxy installation process, providing you with the knowledge and confidence to tackle the project or know what to expect from a professional.
Why Choose Epoxy Flooring?
- Stain-resistant and easy to clean
- High-gloss finish with various design options
- Durable and long-lasting with proper installation and maintenance
- Improved appearance and increased home value
Preparation is Key
The garage floor epoxy installation process begins with proper preparation. This includes:
-
Grinding the floor to remove imperfections, old finishes, and sealants.
This process reduces moisture and speeds up the installation process by allowing the epoxy to seep into the concrete slab. It also ensures the formation of necessary structural and chemical bonds.
-
Cleaning the floor to ensure a strong bond between the epoxy and concrete.
A clean surface is essential for a long-lasting finish.
-
Priming and repairing any damaged areas.
This step is critical to prevent any imperfections or weak spots.
-
Applying a base coat to protect the concrete and create a uniform surface.
This coat also helps the epoxy adhere better to the concrete.
The Epoxy Installation Process
After preparation, the epoxy installation process begins with the application of a specialized epoxy blend. This blend is specifically designed for garage floors and is formulated to provide excellent adhesion and durability.
-
Application of the epoxy mixture using a specialized spreader or trowel.
This step is critical in achieving an even and smooth application.
-
Allowing the epoxy to cure and dry according to the manufacturer's instructions.
This can take anywhere from 24 to 48 hours, depending on the type and thickness of the epoxy.
-
Applying additional coats as needed, following the manufacturer's instructions.
This step can vary depending on the desired finish and color.
-
Finishing with a clear topcoat to protect the epoxy and enhance its appearance.
This final coat is critical in ensuring the epoxy lasts for years to come.
What to Expect During the Installation Process
The garage floor epoxy installation process typically takes 1-3 days, depending on the size of the area and the complexity of the project. During this time, you can expect:
-
Minimal disruption to your daily routine.
Professional installation by experienced contractors.
A detailed work plan and timeline provided by your contractor.
Maintenance and Tips
Regular maintenance and proper care can ensure your epoxy floor remains in excellent condition for years to come. Some tips include:
-
Cleaning spills and stains promptly.
This helps prevent damage and discoloration.
-
Using a gentle cleaner specifically designed for epoxy floors.
This helps maintain the appearance and prevents damage to the finish.
-
Avoiding harsh chemicals, abrasive cleaners, and excessive water.
This helps prevent damage and ensures the longevity of the epoxy finish.
Conclusion
The garage floor epoxy installation process is a multifaceted and crucial step in achieving a durable and attractive finish. By understanding the importance of preparation, the installation process, and maintenance, you can confidently choose the right contractor for the job or tackle the project yourself. Remember, proper installation and care will result in a beautiful and long-lasting epoxy floor that enhances the appearance and functionality of your home or business.


 - steelcoatedfloors.com")
:strip_icc()/brushing-epoxy-onto-garage-floor-2KJAAgbNKvyBRtXdtJd2aV-ec7d2c0d4f46408eac4dbc7465528781.jpg "Epoxy Garage Floor in Noblesville, IN (46060)")
 - steelcoatedfloors.com")
